Kiwi Cultivation
Kiwi cultivation is a meticulous and satisfying procedure since kiwi fruits grow on enormous vines that resemble grapevines in terms of growth patterns, fruiting behaviors, and the requirement for training and trellising. The fruit usually weighs between 40 and 90 grams and reaches maturity within 25 weeks of flowering.
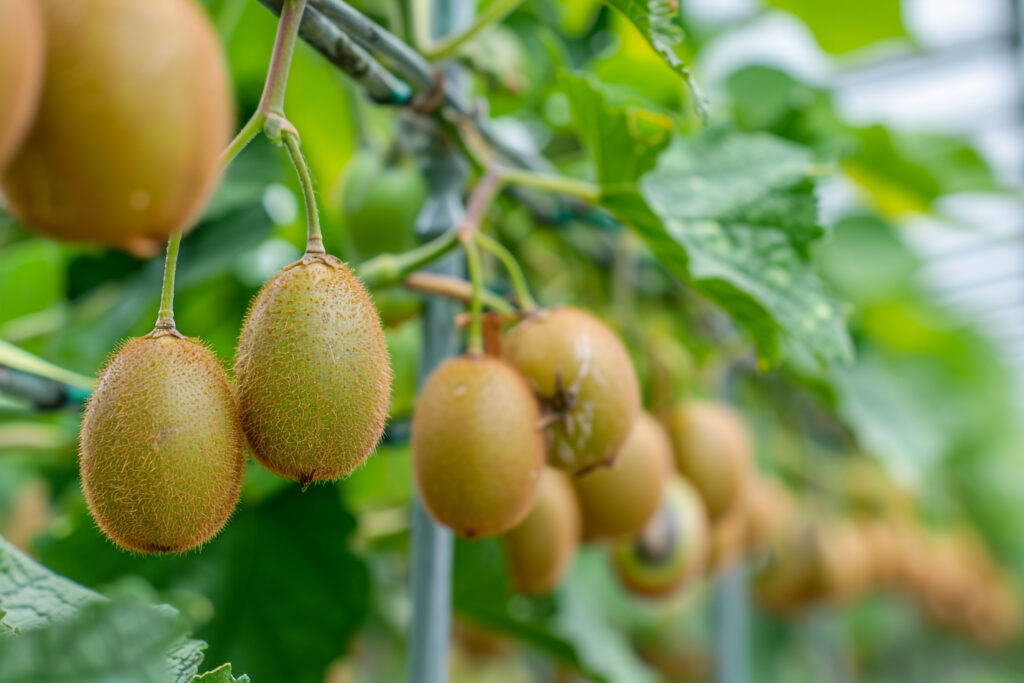
The fruits can be kept in cold storage at 0°C for 4–6 months after harvesting, which often happens soon after the first frost in the fall. Kiwi vines do well at elevations between 1000 and 2500 meters and may grow in a variety of soil types. In kiwi cultivation, proper care—such as trellising and frost management—is crucial for optimum growth and fruit yield.
The kiwi plant is dioecious, which means that it has distinct male and female plants, a critical aspect of kiwi cultivation. Only the female plants bear fruit once pollinated by a male plant. Both male and female plants must flower at the same time for successful fruit production, with a recommended ratio of one male vine for every eight female vines to ensure efficient pollination.
To achieve a healthy crop and optimize productivity, kiwi cultivation demands close attention to planting, pollination, and storage procedures. By understanding the plant’s growth requirements and reproductive biology, farmers can successfully grow kiwis and preserve their quality during storage.
Land Preparation
Land preparation for planting begins with clearing the land of weeds, rocks, and debris to establish a clean and unobstructed area, followed by plowing and harrowing the soil to break it into a fine tilth, which enhances root penetration, aeration, and overall soil structure; the final step involves leveling the land to ensure even water distribution during irrigation, creating an optimal environment for plant growth and development.
Soil Type
Kiwifruit plants thrive best when exposed to full sun for at least 6-8 hours daily, which is essential for maximizing photosynthesis and fruit production, and they prefer well-drained, fertile soils with a pH range of 5.5 to 7.0, with loamy soils being ideal as they offer good aeration, drainage, and moisture retention. Conversely, heavy clay soils should be avoided, and the calcium carbonate (CaCO₃) content in the soil should remain below 10%, as higher levels can lead to significant issues, particularly with nutrient uptake, such as iron deficiencies.
Climatic Requirements for Kiwi Cultivation
Kiwi plants thrive in temperate climates with an ideal temperature range of 14°C to 24°C, though young plants are sensitive to frost, necessitating protective measures in frost-prone areas; they require consistent moisture, making regions with annual rainfall of 1500-2000 mm suitable, while irrigation is essential in drier areas to maintain adequate moisture levels.
Major Cultivars
Some popular kiwi cultivars include Hayward, Bruno, Monty, Allison, Hayward Oblong, Hayward Oval, and Red Kiwi, with Hayward being the most widely grown due to its large fruit size and excellent storage quality.
Planting
For planting kiwi vines, T-bars are commonly used as trellis support. These T-bars consist of 2.5–3 m long iron posts anchored into the ground, with about 1.8 m above the surface and 60–70 cm buried in the soil. The horizontal arms of the T-bar extend 1–1.2 m, and the bars are spaced roughly 4.5 m apart. Galvanized wires are strung tightly between the bars to form the trellis structure, while the end posts are reinforced with 4–5 wires for stability. It is important to position the kiwi plants at least 0.6 m away from the T-bars to ensure proper growth and support.

a). Planting Season
The optimal time to plant kiwi plants is when they are dormant, which is usually late winter or early spring. This timing minimizes transplant shock, enables the roots to settle with little stress, and sets up the vines for rapid growth throughout the upcoming warmer months.
b). Spacing
Proper spacing is crucial for healthy growth. A spacing of 6 meters between plants and 5 meters between rows is recommended.
c). Pit Preparation
Dig pits that are roughly 1 m x 1 m x 1 m, then fill them with a mixture of topsoil and 20–30 kg of compost manure.
d). Planting Method
Saplings should be planted in the center of the pits, ensuring the roots are well-spread and covered with soil.
e). Number of Plants per Acre
Approximately 135 plants can be accommodated per acre, depending on the spacing.
Intercropping in Kiwi cultivation
Intercropping in kiwi cultivation involves growing compatible crops alongside kiwi vines to optimize land use, improve soil health, and increase farm productivity. This practice offers benefits such as enhanced soil fertility through nitrogen-fixing legumes like beans or clover, weed suppression with cover crops, pest management using repellent plants like marigolds or garlic, and additional income from short-duration crops like leafy greens or herbs.
Suitable intercrops include legumes, vegetables, herbs, flowers, and cover crops, which can also regulate the microclimate by conserving moisture and reducing soil erosion. However, successful intercropping requires careful planning to avoid competition for resources like sunlight, water, and nutrients.
Key considerations include proper spacing, selecting crops with shallow root systems and short growth cycles, and adjusting irrigation and fertilization practices. Challenges include potential competition, increased management complexity, and harvesting difficulties. When implemented thoughtfully, intercropping can be a sustainable and profitable strategy, enhancing soil health, reducing input costs, and maximizing kiwi orchard productivity.
Irrigation in kiwi cultivation
Irrigation plays a vital role in kiwi farming, ensuring healthy growth and maximizing fruit yield. The water needs of kiwi plants vary based on their age, growth stage, and environmental factors. Young kiwi plants in their first year require about 15 liters of water per week, equivalent to 2-3 liters per tree daily, to maintain consistent moisture for root development.
As the plants mature, reaching their fourth year and beyond, their water demand rises significantly, with a weekly requirement of approximately 70 liters, or 7-10 liters per tree per day, particularly during crucial phases like flowering and fruit formation.
Seasonal adjustments are essential, such as increasing irrigation during hot, dry spells and reducing it in the dormant winter months to preserve optimal soil moisture and plant health. Below is a detailed daily irrigation schedule for kiwi plants, from planting to maturity, measured in liters per tree per day.
Irrigation Schedule
| Plant Age | Daily Water Requirement (Liters/Tree/Day) | Key Notes |
| 1st Year | 2-3 liters | Frequent, light watering to establish roots. |
| 2nd to 3rd Year | 4-6 liters | Moderate watering as the plant grows and roots expand. |
| 4th Year+ | 7-10 liters | Higher water requirement during flowering and fruiting stages. |
| Summer | +20-30% of normal requirement | Increase water due to higher evaporation and plant stress. |
| Winter | -50% of normal requirement | Reduce water during dormancy to avoid waterlogging and root rot. |
Fertilizer and Manure
To ensure healthy kiwi cultivation, it is crucial to supply essential micronutrients such as zinc, boron, and magnesium through foliar sprays or soil application. For organic kiwi cultivation, chemical fertilizers should be replaced with organic alternatives like vermicompost, neem cake, and bone meal, while carefully maintaining the same nutrient balance to support optimal growth and fruit production. Fertilizer Requirement for Kiwi Plants (Per Plant Per Year)
| Plant Age | Nitrogen (N) | Phosphorus (P₂O₅) | Potassium (K₂O) | Organic Manure | Key Notes |
| 1st Year | 50-100 g | 25-50 g | 50-100 g | 10-15 kg | Focus on root establishment; apply fertilizers in split doses. |
| 2nd Year | 150-200 g | 75-100 g | 150-200 g | 15-20 kg | Increase fertilizer as the plant grows; apply in 3-4 split doses annually. |
| 3rd Year | 250-300 g | 100-150 g | 250-300 g | 20-25 kg | Supporting vegetative growth; ensure balanced nutrient supply. |
| 4th Year+ (Mature) | 500-600 g | 200-250 g | 500-600 g | 25-30 kg | Higher nutrient demand during flowering and fruiting; apply in split doses. |
Weed Management in Kiwi Cultivation
a). Weed Management Before Planting
An effective method to manage weeds before planting vines involves cultivating the soil, irrigating to germinate new weeds, and then cultivating again to reduce the weed seed population and minimize weed emergence. At least two cycles of this process are recommended to significantly reduce annual weeds, though it is less effective for perennial weeds if the soil remains moist.
For perennial weeds like dallisgrass, bermudagrass, and johnsongrass, cultivate dry soil to cut rhizomes into small pieces and expose them to dry out. Repeat the process to desiccate new rhizomes, as irrigation or rain before complete control can lead to re-rooting and increased weed populations. Once perennial weeds are destroyed, promptly eliminate any emerging seedlings after irrigation or rainfall to prevent reestablishment.
Preemergence herbicides are not registered for kiwifruit vineyards before planting, so postemergence herbicides like glyphosate, followed by cultivation, are safer options. Fumigants such as metam sodium (Vapam) can also control weeds and soilborne pests when applied correctly.
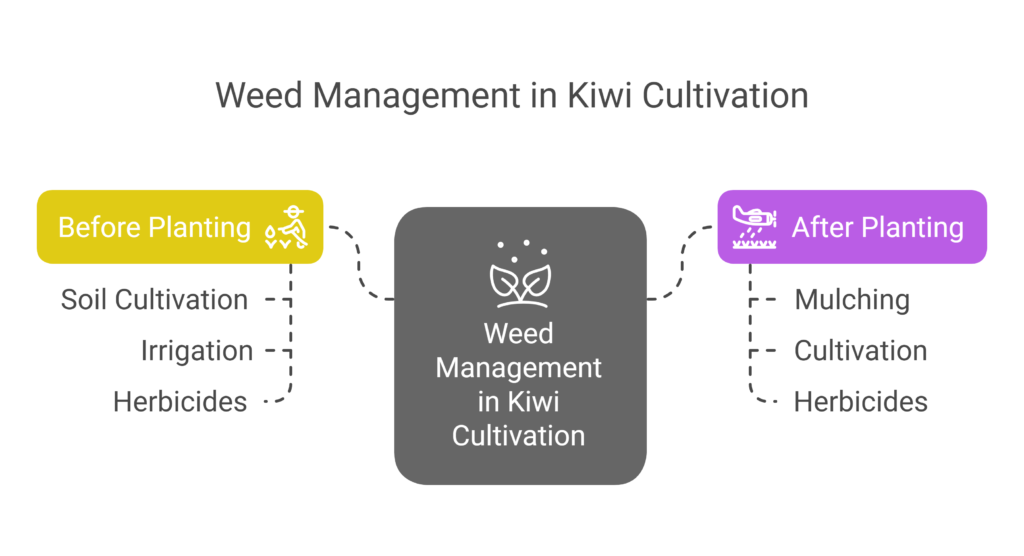
b). Weed Management After Planting
Weeds at the base of vines can be controlled through mulching, cultivation, mowing, or herbicides. Frequent hoeing or cultivation between rows helps reduce competition and prevents weeds from seeding. Mulching, particularly with black polypropylene, prevents weed germination while allowing water penetration, though it can be costly.
Some growers limit mulch to smaller areas under emitters to save costs. Herbicides are often used in a 4-6-foot strip under the vine row to reduce competition and rodent damage. Preemergence herbicides are safest for established vines, controlling annual and some perennial weed seedlings, while postemergence herbicides can be used alone or combined with preemergence options for existing weeds. Repeated spot applications may be needed for perennial weeds, but care must be taken to avoid vine injury from herbicide contact.
Pest and Disease Management
Common Pests
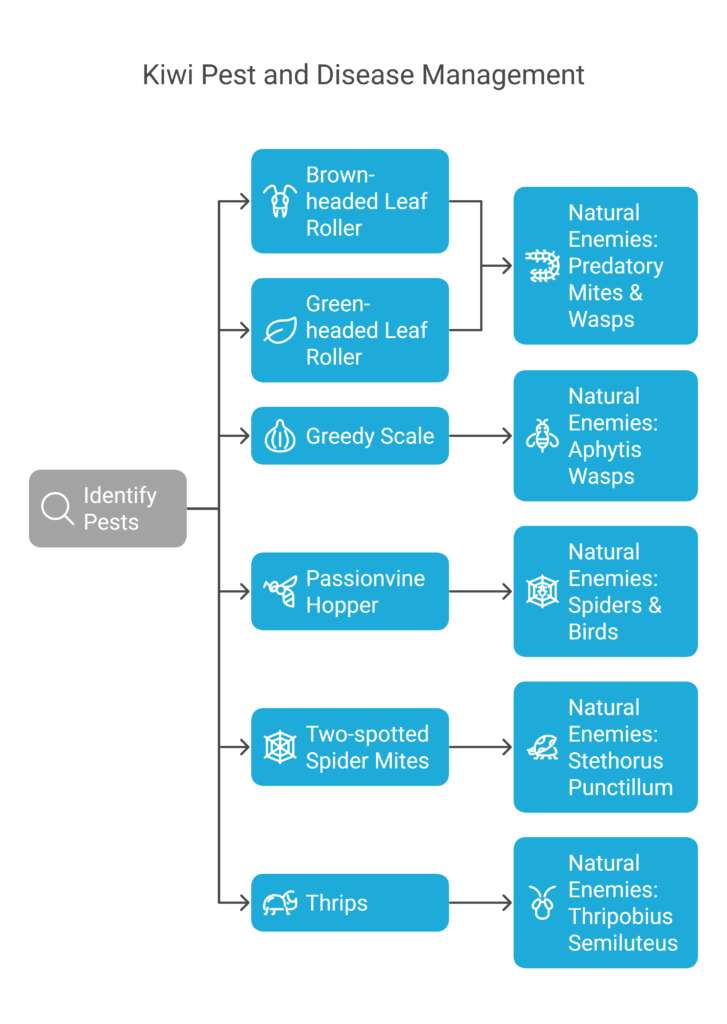
a). Brown headed leaf roller
Damage symptoms include the webbing together of leaf edges or leaves and fruit to form shelters, often rolling leaves into a tube, as the caterpillars feed on both leaves and fruit; natural enemies of the brown-headed leaf roller include predators such as predatory mites and wasps, as well as larval parasitoids like Trigonospila brevifacies, Braconid wasps, Dolichogenidea tasmanica, and Goniozus jacintae.
b). Green headed leaf roller
Damage symptoms include the webbing together of leaf edges or leaves and fruit to form shelters, often rolling leaves into a tube, as the caterpillars feed on both leaves and fruit; natural enemies of the green-headed leaf roller include predators such as predatory mites and wasps, as well as larval parasitoids like Trigonospila brevifacies, Braconid wasps, Dolichogenidea tasmanica, and Goniozus jacintae.
c). Greedy scale
Damage symptoms include infestations spread by mobile young scale nymphs, or “crawlers,” while older nymphs and adults remain sedentary; scale insects attack the bark and fruit of kiwi, with heavy infestations reducing plant vigor and causing scales to appear on fruit, leading to off-grade quality. Natural enemies of greedy scale include parasitoids such as Aphytis wasps and Encarsia species, as well as predators like green lacewings, minute pirate bugs, ladybird beetles, and species such as Chilocorus bipustulatus, Chilocorus infernalis, and Chilocorus cacti.
d). Passionvine hopper
Damage symptoms include the sucking of sap from succulent shoots, leading to distortion of fruit and leaves, stunted growth, wilting, and dieback of plants; the copious production of honeydew also significantly increases the likelihood of sooty mold development. Natural enemies of the passion vine hopper include egg parasitoids like Scolypopa australis and predators such as spiders and birds.
e). Two spotted spider mites
The mite first manifests as tiny, whitish spots, mostly around the midrib and larger veins; as these spots combine, the empty cells form whitish or silvery-transparent patches on the leaf. Damage symptoms include the mite entering plant cells, especially on the undersides of leaves, and consuming their contents, killing one to two dozen cells per minute. Predators including Stethorus punctillum, Phytoseiulus persimilis, and Scolothrips sexmaculatus are natural adversaries of the two-spotted spider mite.
f). Thrips
Damage symptoms include thrips using their mouthparts to rasp the leaf surface, rupture epidermal cells, and feed on the exuding cell contents, causing feeding spots to turn yellow, then brown, with the surrounding areas becoming silvery as air enters the emptied cells; natural enemies of thrips include larval parasitoids like Thripobius semiluteus and predators such as predatory mites, predatory thrips, hoverflies, and mirid bugs.
Common Diseases
a). Root rot
Reduced shoot growth is observed, with leaves appearing small and chlorotic, while vines may either collapse suddenly or exhibit a gradual decline in productivity over several seasons; additionally, a red-brown discoloration of the roots and root crowns becomes visible when the root is cut in two.
b). Leaf spot
Disease symptoms include vines potentially collapsing completely, with white mycelial mats visible under the bark near the soil line, dark discoloration of cortical tissue, and the presence of white mycelial strands and rootlike rhizomorphs extending into the soil; the fungal pathogen survives for many years on infected wood and roots below ground, and disease emergence is favored by consistently damp soil conditions.
c). Stem rot
The pathogen causes a reddish-brown dry cortical root rot that can extend into the base of the stem, potentially leading to plants snapping off during high winds later in the season due to cortical rot, accompanied by foliar symptoms such as yellowing or wilting of leaves; the pathogen survives on infected crop debris and soil, which serve as sources of primary inoculum, and the disease is more prevalent during the rainy season, with high soil moisture, moderate temperatures, and high humidity favoring its development.
d). Bacterial leaf spot
Bacterial leaf spots and blossom blight cause symptoms such as angular-shaped spots, often with a halo (though not always clearly visible), brown discoloration of buds, and, in advanced stages, the leakage of red-rusty gum; however, not all symptoms appear simultaneously.
e). Powdery mildew
The fungal disease known as powdery mildew in kiwis is typified by white, powdery patches on the leaves, stems, and fruit. It frequently results in leaf curling, limited growth, and decreased fruit quality. Spores delivered by wind or water are how the fungus spreads and grows best in warm, humid environments with inadequate air circulation. Proper trimming, fungicide sprays, and preserving adequate airflow to reduce infection are all components of effective maintenance.
Harvesting
Kiwifruits are ready for harvest when they reach full size, their seeds turn black, and the fruit is firm but not hard, indicating maturity; during harvesting, fruits should be hand-picked carefully to avoid damage, and pruning shears can be used to cleanly cut the fruit from the vine. After harvesting, it is essential to store the fruits in a cool, dry place, as proper post-harvest handling and storage are crucial to maintaining fruit quality and extending shelf life.
Post Harvest Management
a) Grading
Kiwi fruits are meticulously graded according to their weight to maintain quality and consistency, with fruits weighing 70 grams and above classified as ‘A’-grade, signifying the highest quality, while those weighing between 40-70 grams are categorized as ‘B’-grade. This systematic grading ensures that the fruits meet stringent market standards and align with consumer expectations, facilitating better pricing, packaging, and distribution. By categorizing kiwis based on weight, producers can deliver a uniform product that appeals to buyers and maintains the reputation of the produce in the marketplace.
b) Storage
Kiwi fruits have a remarkable shelf life, staying fresh for up to 8 weeks in a cool, dry place without refrigeration. For longer storage, they can be kept in cold storage at -0.6°C to 0°C, maintaining quality for 4-6 months. Proper storage preserves their texture, flavor, and nutritional value, making kiwis ideal for both short-term and long-term use.
c) Packing
There is no universally standardized package for kiwi fruits, but cardboard boxes with a capacity of 3-4 kg are commonly used for packing. To enhance storage efficiency, polythene liners are often placed inside the storage cases. These liners help maintain high humidity levels, which are essential for keeping the fruits fresh and in good condition for extended periods.
d) Transportation
Road transport, primarily using trucks or lorries, is the most convenient and widely used method for transporting kiwi fruits. This mode of transport is preferred due to its accessibility, allowing easy movement from orchards to markets. Efficient transportation ensures that the fruits reach their destination in optimal condition, minimizing damage and spoilage.
e) Marketing
Most kiwi farmers sell their produce through commission agents at the market or trade agents at the village level. In order to ensure a seamless distribution process, these middlemen are essential in bringing together farmers and purchasers. Proper post-harvest management and efficient marketing techniques help growers increase profits and maintain their standard of living.